

Building a web-enabled reporting system of from an existing data structure is a common requirement faced by developers. This tutorial will illustrate step by step how to build a custom user interface for such a requirement. Many open-source projects will be used, including valuelist.
First lets review the requirements. We always get requirements before starting development, of course:)
Now that the requirements are understood the development can begin.
There is a sample web app that can be used as a starting point for this tutorial. There are two downloads available:
This tutorial will use the Simple War that is ready to be deployed to any J2EE container. This war can be droped in your favorite container and modified from there. Tomcat 5.0.8 will be used for this turtorial.
For advanced users a Maven Project that is all set up and ready to use may be downloaded. This option is ideal if you are farmilar with Maven and Eclipse.
Now that the Simple War has been downloaded, drop it in the webapps directory. Using Tomcat this is located at: {TOMCAT_HOME}/webapps.
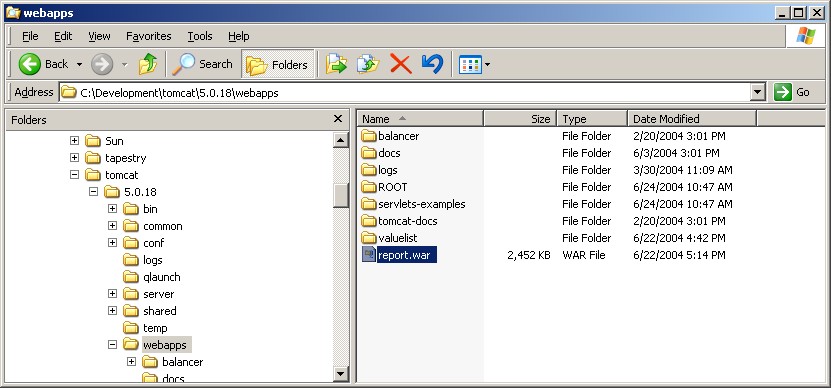
Once the report.war is placed in the webapps directory, start Tomcat. Upon startup Tomcat will expand the war into the following structure.
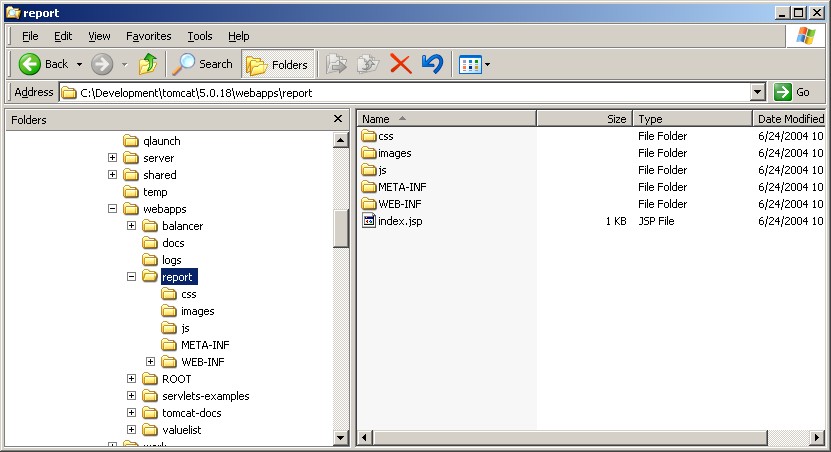
{TOMCAT_HOME}
\---webapps
\---report (Root)
+---css (Cascading Style Sheets)
+---images (Images used by the valuelist and other components)
+---js (Javascript)
\---WEB-INF
+---classes
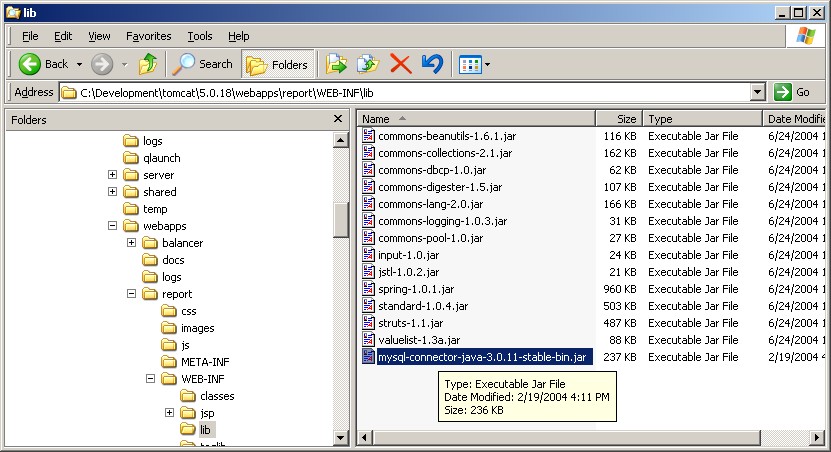
+---lib (3rd party jars, including valuelist)
+---jsp
| +---layout (Tiles layouts and components)
| \---reports (***** Add your custom reports here *****)
+---tiles (Tiles configuration)
Now that tomcat is started and has expanded the report.war the application can be viewed in a browser. Point your favorite browser to http://localhost:8080/report. Below is the welcome page and the two sample reports.

Now that every thing is up and running, we can start to modify the application. The following tasks will need to be performed to complete this tutorial:
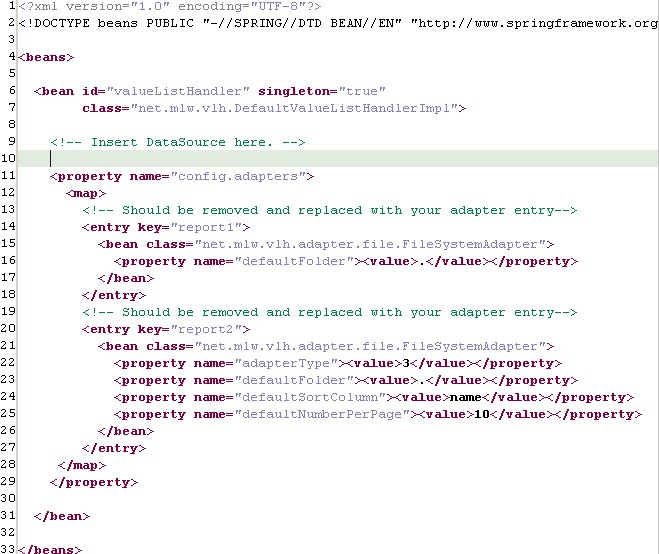
The original WEB-INF/classes/applicationContext.xml file.
For this tutorial a MySql database will be used. WE need to add a DataSource that uses the com.mysql.jdbc.Driver driver. The new WEB-INF/classes/applicationContext.xml file.
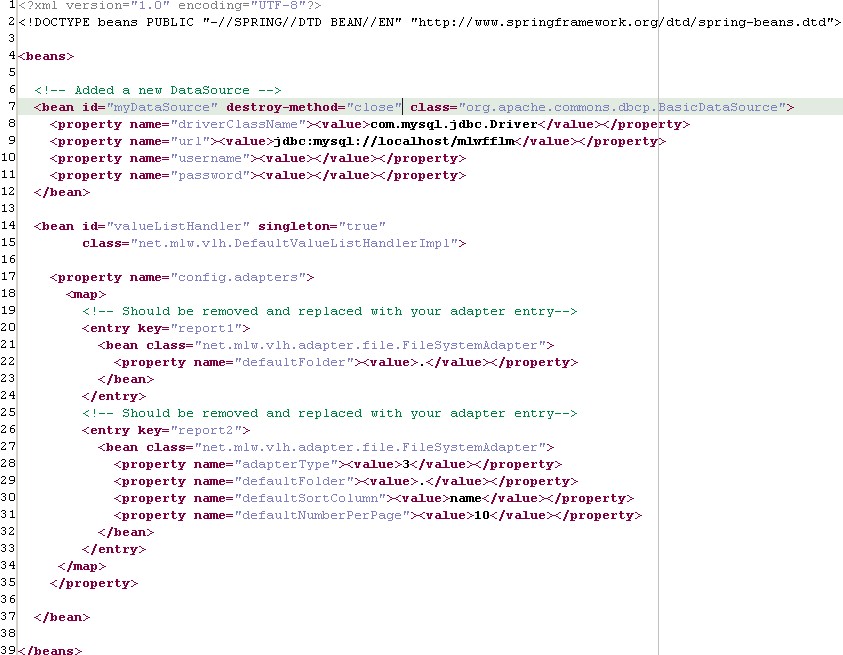
NOTE: now that we are introducing MySql into the solution we will have to get the jar file that contains the mysql jdbc driver. This jar should be placed in the WEB-INF/lib directory.
The original WEB-INF/classes/applicationContext.xml file contained two adapter entries. Both of type net.mlw.vlh.adapter.file.FileSystemAdapter. Delete these two adapters, and add a new adapter.
Since we are querying against a relational database, and we expect the query to be complex, a good option is the DynaBeanAdapter. (You could write your own adapter if you desire). We want 20 entries per page, and the results should be sorted by the points_avg column. We will come back to the query later.

The report page we are creating will be named playerRank.jsp. Create this file in the WEB-INF/jsp/reports directory. I have used report1 as a starting point for this jsp.
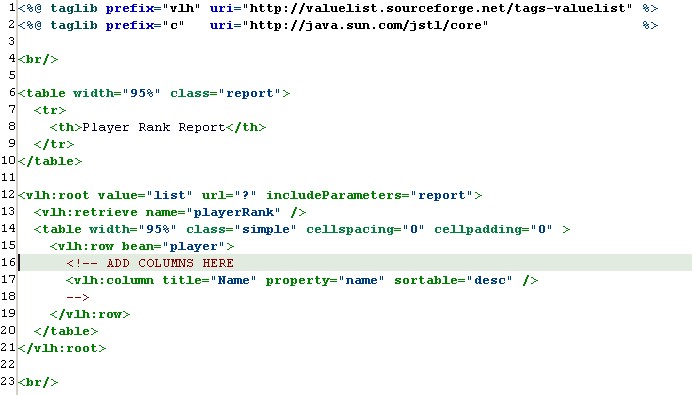
| Line # | A description of what is going on |
|---|---|
| 1-2 | taglibs are imported for use on this page. |
| 8 | The title of this report. |
| 12 |
vhl:root tag.
This tag is a required parent element for all other vlh tags. |
| 13 |
vhl:retrieve tag.
This tag with the context of the vhl:root tag calls the ValueListHandler service and retrieves a ValueList. Notice the name="playerRank" attribute, this must match the name of the adapter entry in the applicationContext.xml file discussed above. |
| 15 |
vhl:row tag.
This tag with the context of the vhl:root tag iterates through the ValueList and generates the table. |
| 16-18 |
vhl:column tag.
This tag adds a column to the table. |
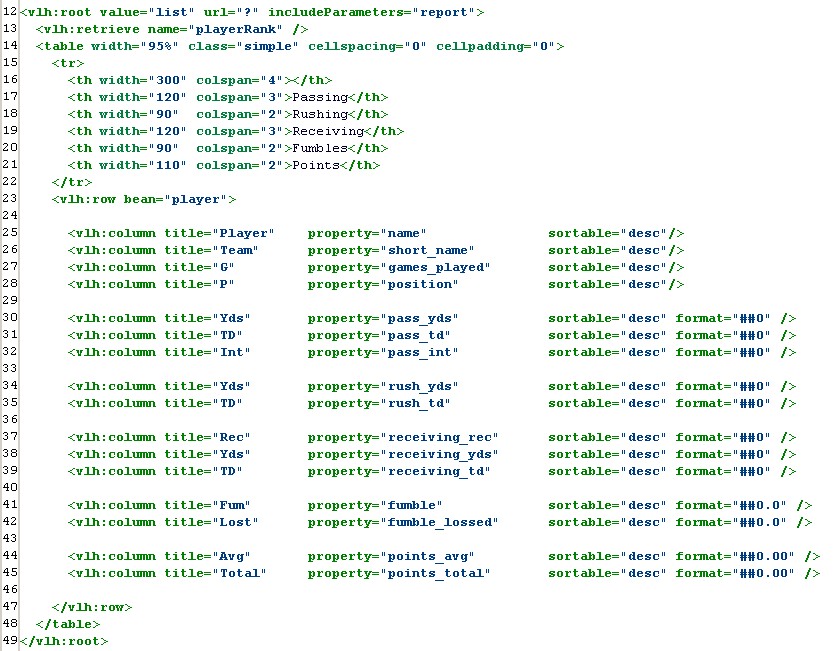
After we've added all the columns that the requirements define, we end up with the following:
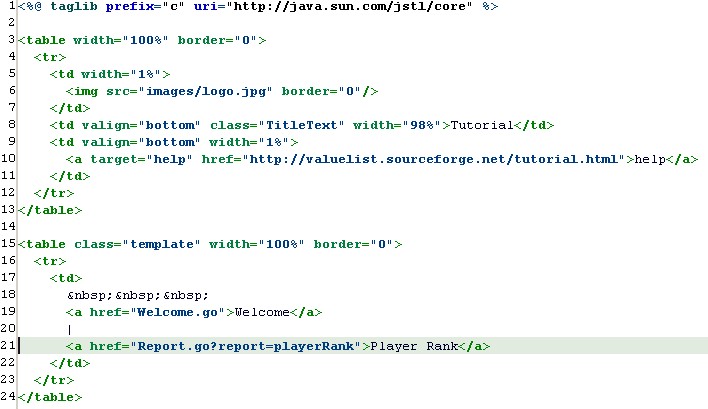
Open the file: jsp/layout/Header.jsp.
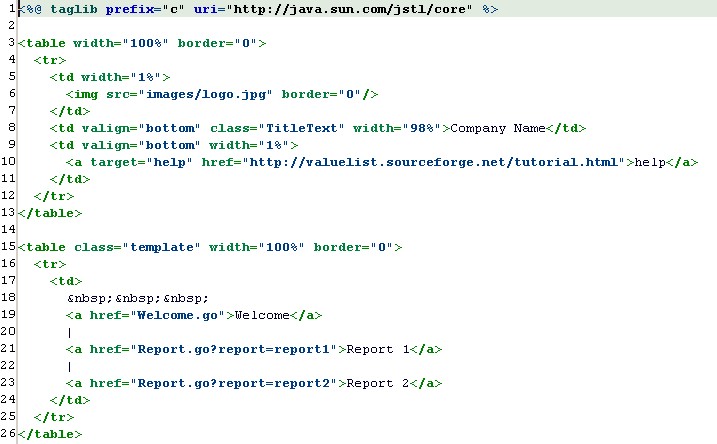
Remove the links to the two sample reports, and create a new link. You may replace the logo and company name as well.
NOTE: The url to the report is the name of the jsp without the extension. Spring MVC is used, see ? for more details.
WORK IN PROGRESS...